I repaired my Steam Deck and it was fine, actually
For Christmas 2022, I bought my husband a Steam Deck. It's a handheld games console that runs a version of Linux (so you can also use it as a computer and plug it into a monitor, if you want), and works seamlessly with nearly every game in your Steam Library. It's GREAT. I 100% use it more than he does, to play all manner of weird and wonderful things. It plays older games perfectly, and I even managed to play a bit of Baldur's Gate on there when it came out and my husband was playing it on the PS5 (and I just couldn't wait my turn). Had to crank the graphics down a bit and the battery didn't last super long, but it still ran!
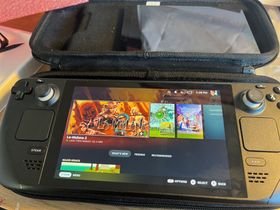
Over the past Xmas period I played an unholy amount of La Mulana 2. A few weeks back I noticed that what I thought was a smear on the screen was actually a crack. I have no idea how it happened – I think I must have dropped it or something? It was well out of its warranty by this point, so I looked into repair options and was delighted to see that Valve actually recommend that you try and repair it yourself. They sell official repair parts through iFixit, who also have brilliant step-by-step instructions with really clear pictures. I've built a (granted, much larger) PC before, and I fixed the spring in my PS5 controller trigger, so I figured I'd give it a go.
So, I ordered a replacement screen kit, which comes with an iOpener kit that should be useful for the other small electronics I inevitably break somehow in the future. I also picked up a magnetic project mat: it looks a bit like a cutting mat, but it's magnetic and comes with an erasable OHP pen.
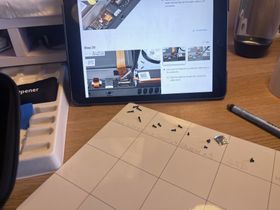
The iFixit instructions were really clear with the exception of the one about applying thermal paste, which said to apply thermal paste "[using] the application method recommended for your specific processor type". While the Steam Deck has an AMD processor, it's a custom CPU as far as I can see, and the Arctic Silver website they linked didn't have it listed. But I decided to go for a good old-fashioned pea-sized blob of paste, and it seems to be fine.
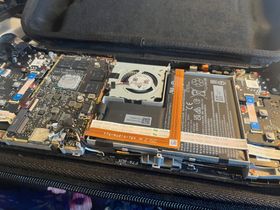
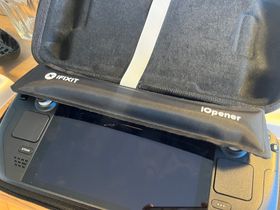
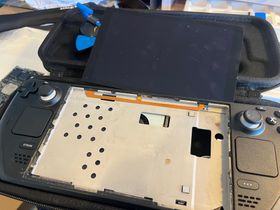
Overall, it went really well! I managed to replace the screen, and the hardest thing was actually applying the fiddly little adhesive stickers. To get the screen off, I first had to heat the adhesive – I used the microwaveable gel-filled iOpener tool that came in the kit, but you can use a hairdryer as well.
I did have one near miss, though, but not until after the repair: when I reassembled the deck I noticed the right trackpad wasn't working, and after a bit of googling and opening it up again it turned out that I'd not closed the latch on the ribbon cable connector properly. So I sorted that, and put the back case back on... only to realise I'd forgotten to take the Micro SD card out (the iFixit instructions tell you in red lettering right at the start to do that before you do anything else, and I did do that the first time round, but forgot I was supposed to do it when I opened it up after the repair). As I tried to put the back on, it snapped in half, leaving the half with the chip on stuck inside the SD card slot. I was slightly concerned I'd end up having to send it off for repair after all, but miraculously I managed to coax it out after some gentle prying with a pair of long-nosed tweezers, being careful not to damage anything. I tested it with another Micro SD card I had lying around, and thankfully it was fine. The only thing we lost there was whichever games were installed on the Micro SD card as opposed to the internal SSD, but we can just redownload those. It could easily have got permanently stuck or I could've damanged the contacts somehow. A lucky escape!
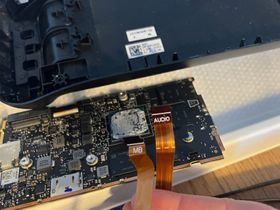
Because the Steam Deck was designed to be repaired, the various parts are well-labelled: the cables for things like the buttons have each end labelled so it's obvious which end goes in the motherboard.
I'm a big proponent of the right to repair, and it makes me happy to see things like this, and official replacement parts easily available! It's absolutely WILD that so many companies don't want us to repair their products, and would rather either make us pay for a replacement or encourage us to buy a brand new product. There is just so much waste and so much unnecessary expenditure.
I mentioned the PS5 controller before: the left trigger suddenly had no friction whatsoever and kept being activated with the slightest nudge. It turns out the tiny spring that keeps it under tension had snapped. I got a replacement for a few quid off eBay, and followed a tutorial on YouTube, saving me the cost of repair.
If you've never repaired your own electronics, I really encourage you to give it a go. Youtube and websites like iFixit are full of guides and step-by-step tutorials. iFixit also sells a lot of replacement parts, both genuine (in the case of Valve products) and aftermarket. The worst thing that happened in this whole process was because I have a terrible memory and wasn't diligent enough to follow the instructions thoroughly a second time, leaving the Micro SD card in. Following the actual steps was a breeze, and electronics are really not that scary, I promise!